Difference: PushbuttonSwitch (2 vs. 3)
Revision 32019-05-17 - UliRaich
| Line: 1 to 1 | ||||||||
|---|---|---|---|---|---|---|---|---|
A simple push button switch | ||||||||
| Line: 13 to 13 | ||||||||
 | ||||||||
| Changed: | ||||||||
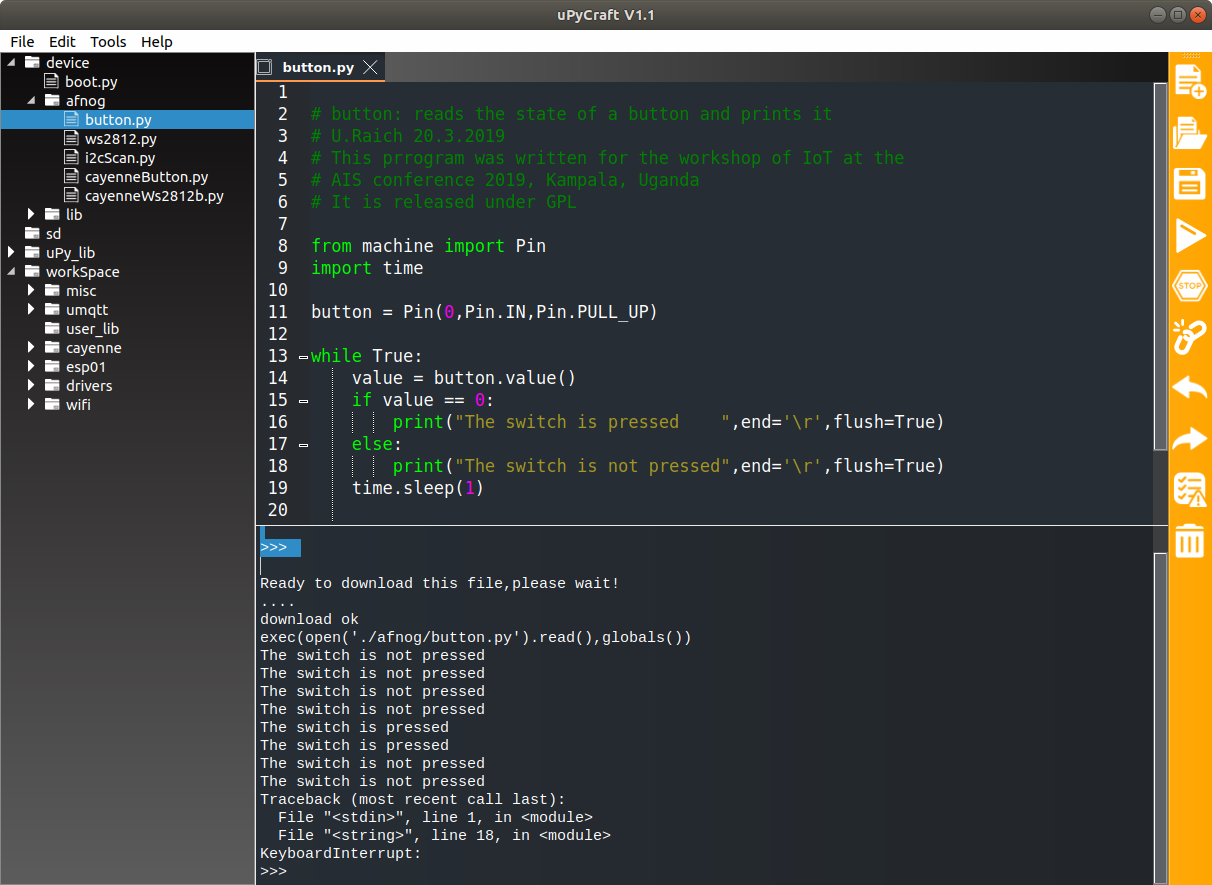
| < < | We define GPIO pin 0 to be an input pin with an internal pull-up resistor through the machine library class Pin. Then we read the pin value which tells us if the button is pressed or not. The switch connects GPIO 0 to ground if pressed. | |||||||
| > > | We define GPIO pin 0 to be an input pin (or pin 17 when running on an ESP32) with an internal pull-up resistor through the machine library class Pin. Then we read the pin value which tells us if the button is pressed or not. The switch connects GPIO 0 to ground if pressed. | |||||||
| Here is the source of this test program: | ||||||||
| Deleted: | ||||||||
| < < | https://afnog.iotworkshop.africa/pub/AFNOG/PushbuttonSwitch/button.py.txt | |||||||
| Changed: | ||||||||
| < < | Please rename this file to button.py after download. Then upload it to the WeMos D1 flash and execute it in uPyCraft. | |||||||
| > > | https://github.com/uraich/MicroPython_IoTDemos/blob/master/drivers/button/button.py | |||||||
| Once the hardware is tested we add the WiFi code and the connection to the myDevices MQTT broker. | ||||||||
| Changed: | ||||||||
| < < | https://afnog.iotworkshop.africa/pub/AFNOG/PushbuttonSwitch/cayenneButton.py.txt | |||||||
| > > | https://github.com/uraich/MicroPython_IoTDemos/blob/master/cayenne/button/cayenneButton.py | |||||||
| This is what you should see in Cayenne: | ||||||||
| Line: 38 to 39 | ||||||||
| ||||||||
| Deleted: | ||||||||
| < < |
| |||||||
| ||||||||
View topic | History: r3 < r2 < r1 | More topic actions...
Ideas, requests, problems regarding TWiki? Send feedback