Difference: TheNopIoTNode (10 vs. 11)
Revision 112019-05-28 - UliRaich
| Line: 1 to 1 | ||||||||
|---|---|---|---|---|---|---|---|---|
The IoT Node and its Processor | ||||||||
| Changed: | ||||||||
| < < | As already indicated in the introduction an IoT node consist of an Internet enabled processor with interfaces to external sensor and actuator hardware. On the Internet side connections can be made through | |||||||
| > > | As already indicated in the introduction an IoT node consists of an Internet-enabled processor with interfaces to external sensor and actuator hardware. On the Internet side connections can be made through | |||||||
| ||||||||
| Line: 21 to 21 | ||||||||
 | ||||||||
| Changed: | ||||||||
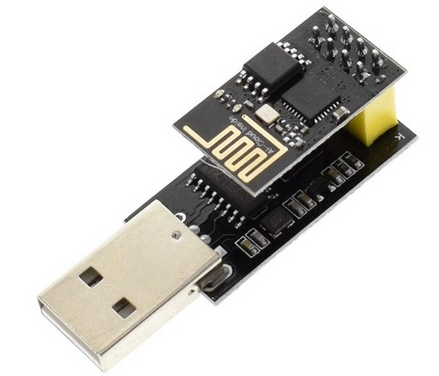
| < < | You can use this card as a USB to serial converter for your PC allowing you easy communication with the ESP01 serial line. In order to re-program the ESP01 however, you must make a minor modification to the board. | |||||||
| > > | You can use this card as a USB to serial converter for your PC allowing you easy communication with the ESP01 serial line. A minor modification to the board is needed however if we want to program its flash. | |||||||
| Here is the ESP01 pinout: | ||||||||
| Line: 33 to 33 | ||||||||
| You can now easily put the ESP01 into programming mode inserting the jumper and into normal running mode when taking the jumper off. | ||||||||
| Changed: | ||||||||
| < < | I tried programming the device first erasing all the flash with esptool which you can find here: https://github.com/espressif/esptool. | |||||||
| > > | I tried programming the device first erasing all the flash with esptool, which you can find here: https://github.com/espressif/esptool. | |||||||
| esptool --port /dev/ttyUSB0 --baud 115200 erase_flash | ||||||||
| Line: 47 to 47 | ||||||||
| https://afnog.iotworkshop.africa/pub/AFNOG/TheNopIoTNode/microPython-ESP32.bin | ||||||||
| Changed: | ||||||||
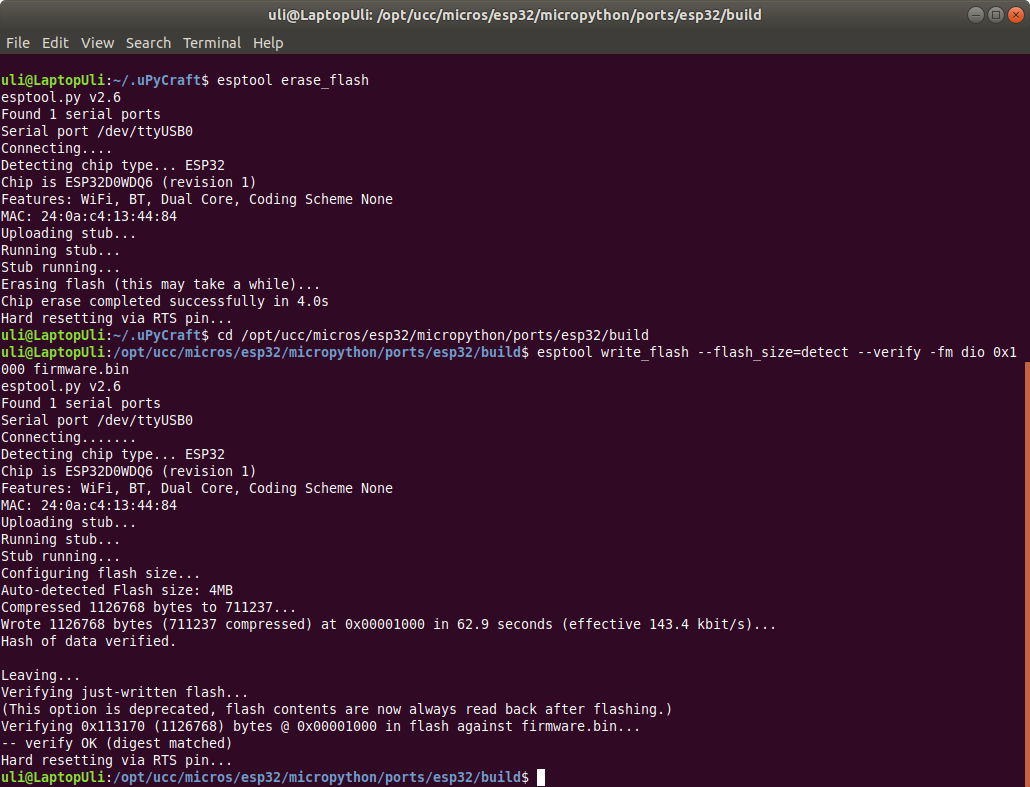
| < < | Here is a screen dump of the messages sent by esptool.py during flash erase and programming: | |||||||
| > > | Here is a screen dump of the messages sent by esptool.py during flash-erase and programming: | |||||||
 I had to take the programmer out in order to reset the ESP01 after each command I sent with esptool. This was true for erasing but also when getting the chip id with
esptool chip_id or reading the MAC address with esptool read_mac. | ||||||||
| Changed: | ||||||||
| < < | When flashing micro Python first insert the jumper at the back of the programmer and insert the programmer into the PC'S USB slot with the ESP01 connected. Erase the flash as seen in the screen dump above. Take the programmer out of the USB socket, wait a few seconds and then pug it in again. Flash the micro Python code as shown above. Take the programmer out again and remove the jumper. Plug the programmer with the ESP01 as piggyback in again. | |||||||
| > > | When flashing micropython, first insert the jumper at the back of the programmer and insert the programmer into the PC'S USB slot with the ESP01 connected. Erase the flash as seen in the screen dump above. Take the programmer out of the USB socket, wait a few seconds and then plug it in again. Flash the micropython code as shown above. Take the programmer out again and remove the jumper. Plug the programmer with the ESP01 as piggyback in again. | |||||||
| Start minicom or another serial terminal emulator and press return. You should get the Python prompt and you can now happily use the newly installed Python interpreter: | ||||||||
View topic | History: r11 < r10 < r9 < r8 | More topic actions...
Ideas, requests, problems regarding TWiki? Send feedback