The IoT Node and its Processor
As already indicated in the introduction an IoT node consists of an Internet-enabled processor with interfaces to external sensor and actuator hardware. On the Internet side connections can be made through- Ethernet
- WiFi
- or any gateway giving access to the Internet. This can be
- a serial connection to a machine with internet access
- a LoRaWan node connected to a base station (which is connected to the Internet)
- a BlueTooth connection to an Internet enabled processor ...
- The Raspberry Pi, which is a full blown computer system running a Debian based Linux operating system with all the tools needed to develop software natively. The Raspberry Pi 3 for example features a quad-core 64 bit ARM processor with 1 GByte of RAM and a micro SD card with up to 32 GBytes of storage space. Due to its capabilities, the Raspberry Pi is a rather expensive solution (~ 70 Euros) especially it only a very limited number of sensors or actuators are connected.
- The Arduino. Originally the Arduino used 8-bit AVR processors and is much less powerful than the Raspberry Pi. The most interesting part of the Arduino family is an Integrated Development Environment running on Windows and on Linux machines and featuring a C++ like programming language. The IDE contains a compiler and a flash programmer for the processor used. The IDE has been extended to processors different from the AVR family and can now be used also for ESP8266 or ESP32 processors or for the STM32 family of processors. In all cases however the software is cross-developed and the resulting binaries are loaded into the processor flash.
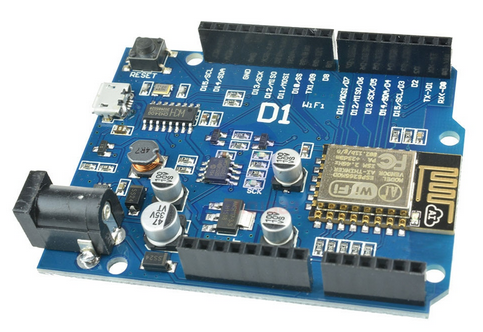
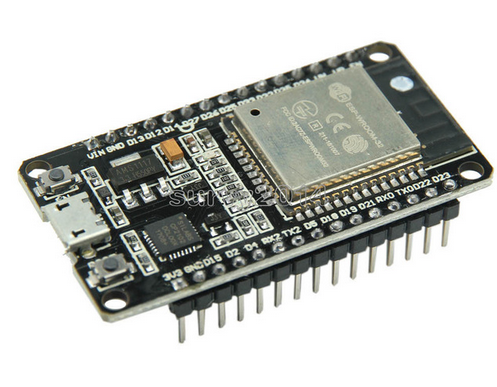
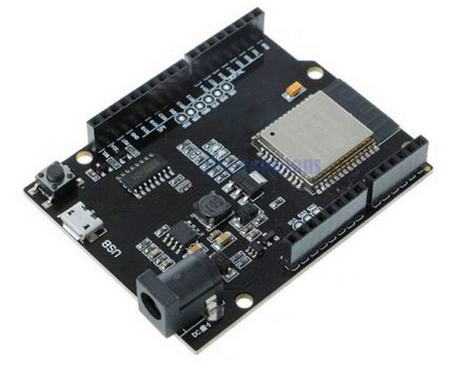
The standard AVR Arduino does not have an Internet connection but there are piggy back boards, so-called shields, that can be plugged on top of the processor board and Ethernet or WiFi shields are available. Processors like the ESP8266 or the ESP32 have Wifi already available on the processor board. The advantage of the Arduino is its price. It is possible to create an IoT node with one or two sensors or actuators less than 5 Euros. - There are boards with an Arduino form factor, same size, same connectors as the AVR Arduinos which however are based on a different processor. Typically they use Espressif's ESP8266 or ESP32 processors, 32-bit machines with integrated WiFi and much more flash memory available than the AVR machine. These machines are ideally suited as IoT nodes. In addition to the Arduino type machine, there are also smaller boards to which sensors can easily be attached. These boards can either be programmed with the Arduino IDE or they can run a Lua or micro Python interpreter.
The ESP01
Although the ESP01 is designed as a WiFi interface with which a host processor communicates through AT commands over a serial line, this device features a powerful ESP8266 processor with 8 MBytes of flash which can be programmed. Of course you will loose the AT firmware but you can easily re-install it if needed. One nice feature of the ESP01 is that several sensor boards have been designed onto which you can simply plug this processor card.... and then there is the price: The whole node, processor, Internet connection and sensor will cost you less than 5 Euros. Here are two examples:
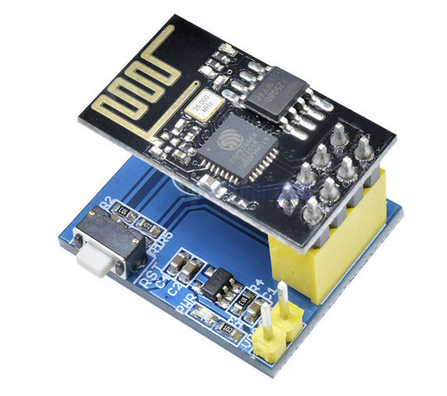 |
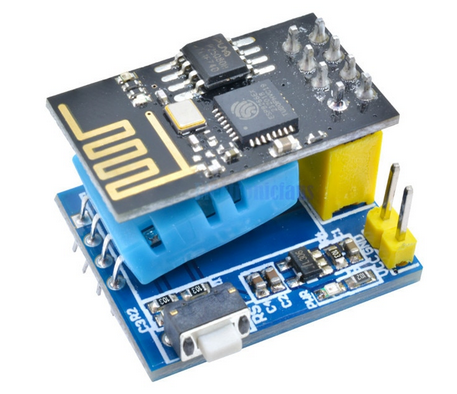 |
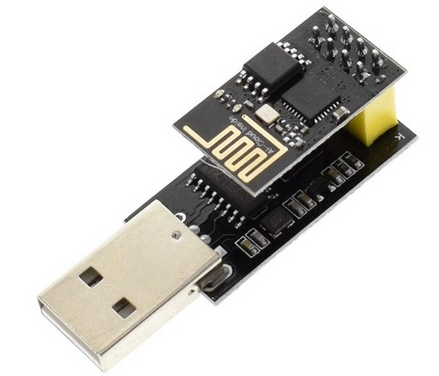 You can use this card as a USB to serial converter for your PC allowing you easy communication with the ESP01 serial line. A minor modification to the board is needed however if we want to program its flash.
Here is the ESP01 pinout:
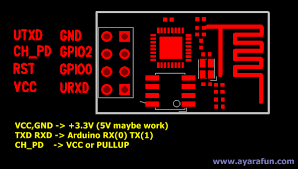 In order to put the ESP01 into programming mode, you must short-circuit GPIO0 to ground when powering the machine. I did this by adding a removable jumper connection to the ESP01 programmer board as shown in this photo:
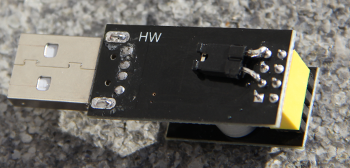 You can now easily put the ESP01 into programming mode inserting the jumper and into normal running mode when taking the jumper off.
I tried programming the device first erasing all the flash with esptool, which you can find here: https://github.com/espressif/esptool.
You can now easily put the ESP01 into programming mode inserting the jumper and into normal running mode when taking the jumper off.
I tried programming the device first erasing all the flash with esptool, which you can find here: https://github.com/espressif/esptool.The micro Python binaries are attached to this page: https://afnog.iotworkshop.africa/pub/AFNOG/TheNopIoTNode/microPython-ESP8266.bin https://afnog.iotworkshop.africa/pub/AFNOG/TheNopIoTNode/microPython-ESP32.bin Here is a screen dump of the messages sent by esptool.py during flash-erase and programming:
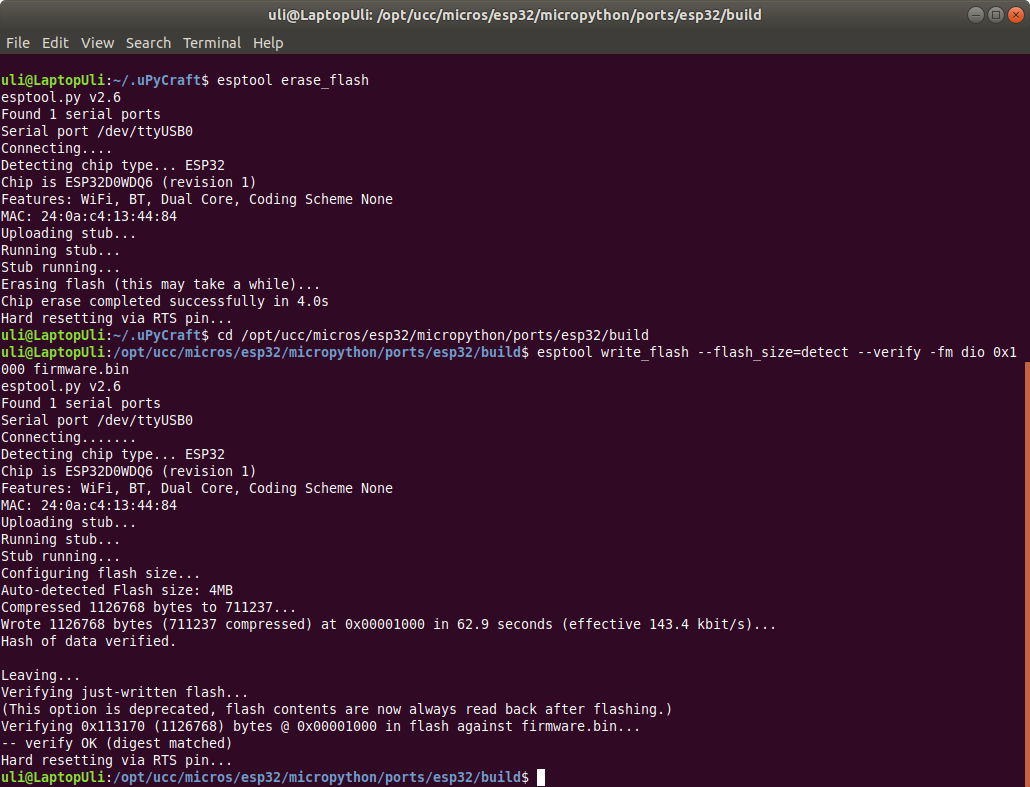 I had to take the programmer out in order to reset the ESP01 after each command I sent with esptool. This was true for erasing but also when getting the chip id with
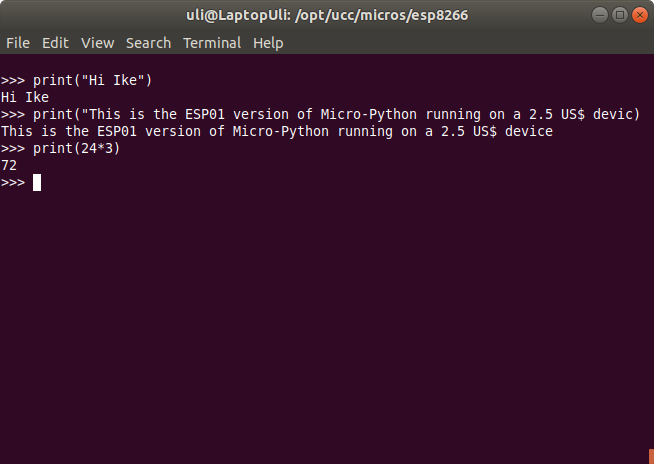
esptool chip_id or reading the MAC address with esptool read_mac. When flashing micropython, first insert the jumper at the back of the programmer and insert the programmer into the PC'S USB slot with the ESP01 connected. Erase the flash as seen in the screen dump above. Take the programmer out of the USB socket, wait a few seconds and then plug it in again. Flash the micropython code as shown above. Take the programmer out again and remove the jumper. Plug the programmer with the ESP01 as piggyback in again. Start minicom or another serial terminal emulator and press return. You should get the Python prompt and you can now happily use the newly installed Python interpreter:
 To make things even simpler I wrote a Python script that automates the procedure.
https://afnog.iotworkshop.africa/pub/AFNOG/TheNopIoTNode/flashMicroPython
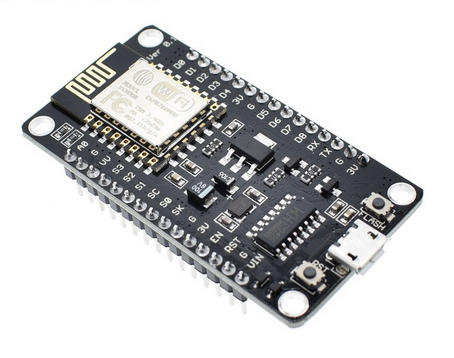
This should work for any of the ESP8266 or EPS32 boards (except the ESP01)
 |
 |
 |
 |
Comments
| I | Attachment | History | Action | Size | Date | Who | Comment |
|---|---|---|---|---|---|---|---|
| |
eps01progmodif.png | r1 | manage | 117.7 K | 2019-02-13 - 14:32 | UliRaich | |
| |
eps01python.png | r1 | manage | 36.0 K | 2019-02-13 - 14:28 | UliRaich | |
| |
esp-01pinout.png | r1 | manage | 6.5 K | 2019-02-13 - 14:10 | UliRaich | |
| |
esp01dht11.png | r1 | manage | 248.5 K | 2019-02-13 - 14:02 | UliRaich | |
| |
esp01ds18b20.png | r1 | manage | 220.2 K | 2019-02-13 - 14:02 | UliRaich | |
| |
esp01programmer.png | r1 | manage | 144.0 K | 2019-02-13 - 14:14 | UliRaich | |
| |
esp32devkit.png | r1 | manage | 233.4 K | 2019-03-02 - 17:29 | UliRaich | |
| |
esp32uno.png | r1 | manage | 188.1 K | 2019-03-02 - 17:29 | UliRaich | |
| |
esp8266Uno.png | r1 | manage | 250.5 K | 2019-03-02 - 17:29 | UliRaich | |
| |
espNodeMCU.png | r1 | manage | 177.5 K | 2019-03-02 - 17:29 | UliRaich | |
| |
firmware.bin | r1 | manage | 1100.4 K | 2019-03-01 - 16:32 | UliRaich | |
| |
flashMicroPython | r1 | manage | 5547.1 K | 2019-03-14 - 08:36 | UliRaich | |
| |
flashMicroPython.py.txt | r1 | manage | 4.4 K | 2019-03-14 - 08:32 | UliRaich | |
| |
flashProgramming.png | r1 | manage | 143.4 K | 2019-03-02 - 10:10 | UliRaich | |
| |
microPython-ESP32.bin | r1 | manage | 1100.4 K | 2019-03-02 - 19:39 | UliRaich | |
| |
microPython-ESP8266.bin | r1 | manage | 575.8 K | 2019-03-02 - 19:39 | UliRaich | |
| |
wemosBmp180.png | r1 | manage | 135.9 K | 2019-03-14 - 10:09 | UliRaich | |
| |
wemosBuzzer.png | r1 | manage | 101.1 K | 2019-03-14 - 09:51 | UliRaich | |
| |
wemosDS18B20.png | r1 | manage | 110.5 K | 2019-03-14 - 09:51 | UliRaich | |
| |
wemosOled.png | r1 | manage | 305.4 K | 2019-03-14 - 09:51 | UliRaich | |
| |
wemosSht30.png | r1 | manage | 138.0 K | 2019-03-14 - 09:51 | UliRaich |
Ideas, requests, problems regarding TWiki? Send feedback


