TFT Displays
Introduction
A wide range of displays is available for use with the Arduino system. For the WeMos D1 mini system I found 3 display boards. Each of them is based a on different controller chip and has different resolution. Here they are are:- 64x48 pixel 0.66" TFT screen with SSD1306 controller. The SSD1306 uses the I2C bus
- 128x128 pixel 1.4" display based on the ST7735 controller. The ST7735 uses the SPI bus
- 320x240 pixel 2.4" display based on the ILI9341 display and the XPT2046 touch controller.
| 64x48 pixels with SSD1306 | 128x128 with ST7735 | 320x240 pixel touch screen with ILI9341 |
 |
 |
 |
Preparing the hardware
Before using the display its solder jumpers on the back must be configured. There are 4 solder fields for configuration- TFT LED. his allows to control the display back light. I leave it unconfigured which results in the back light LED being permanently on
- TFT_CS: D0. TFT_CS and TFT_DC can be selected onto D0, D3, D4 or D8 corresponding to GPIO 26, 17,16, 5. Since D3 and D4 cannot be used on the CPU with PSRAM the only selections possible are D0 and D8. I select D0 for CS and D8 for TFT_DC
- TFT_DC: D8
- TFT_RST is connected to the system reset

The driver software
Searching the Internet I found many display drivers, none of which really satisfied me.- The ssd1306 reference driver included in MicroPython. This driver is very basic and it relies very heavily on its framebuffer superclass
 .
.
- A pure Python version of a ST7735 driver for the ESP32: https://github.com/boochow/MicroPython-ST7735. This a port of a ST7735 driver written by Guy Carver for stm32 processors (https://github.com/GuyCarver/MicroPython/blob/master/lib/ST7735.py). At first glance, this is exactly what I was looking for. However, Guy Carver himself was not too happy about its speed and, compared to other drivers, it has limited functionality.
There is a demo program putting images up onto the screen and another one exercising the driver's graphic functions like- drawing line
- drawing rectangles
- drawing filled rectangles
- drawing text
- A C-module of the above driver also written by Guy. Finding this code was not so easy. It is hidden in a fork of MicroPython, made some years back, and it was again developed for stm32 processors. Since the method of integrating C-modules into MicroPython has been made substantially easier in recent versions of MicroPython quite a bit of work was needed to adapt this driver. When trying it, it was even slower than the Python code! I figured out that the reason was the way the SPI commands are sent to the controller. If you send commands and data in large chunks then you can speed up graphics considerably. This however is true for the Python and the C code.
- A driver for displays based on the SSD1351 controller: https://github.com/rdagger/micropython-ssd1351 The display module used has 128x128 resolution just like the module we have. The driver comes with a big number of demo programs, some of which are rather sophisticated. It also provides many more functions than the ST7735 driver. A very nice tutorial with Youtube video is also available. Unfortunately loading fonts is extremely slow.
I decided to try porting this library to the St7735 chip in such a way that the demo programs would run with a minimum of modification. Speeding up font loading and a port of the demo programs from the above ST7735 driver should be part of the process.
Developing our own driver
The first goal for our own driver was to be able to run all the demo programs on it. Since the calling sequences of the drivers are different (different method names, different way to pass parameters) some modifications to the demo code was of course necessary. In addition the method names and parameters defined in the framebuffer should be available. Comparing the original ST7735 driver to the SSD1351 one we see the following differences| ST7735 | SSD1351 |
|---|---|
| clips drawing elements when they exceed display boundaries | drops drawing elements if any pixel would exceed display boundaries |
| Provides 3 fonts as Python files | Provides many different fonts as C files These fonts must be loaded before use, which takes a long time |
| uses .bmp files for images | uses binary rgb565 files for images |
| does not support sprites | allows use of sprites |
| Comes with 2 demo programs for graphics primitives and image display |
Comes with man demo programs, some of which are rather sophisticated Even supplies simple Arcade games |
Fonts
Fonts are normally loaded into RAM before use. However, this takes time and uses a big amount of RAM memory, a very scarce resource on the standard ESP32. (We are using an ESP32 with additional PSRAM where the problem is much less critical). Since font loading in the SSD1351 driver takes ages (the demo-font program using 9 different fonts took ~ 30s before the first character could be written. After that text writing was fast) I searched for another method and ended up asking the MicroPython forum. Peter Hinch sent me a link to his micropython-font-to-py Finally I copied the fonts into the modules/fonts directory of the MicroPython sources and froze them into the binary.
You can use the fonts by importing the MicroPython module:
from ST7735 import Display, color565 import fonts/sysfont as sysfont sck = Pin(18)
Finally I copied the fonts into the modules/fonts directory of the MicroPython sources and froze them into the binary.
You can use the fonts by importing the MicroPython module:
from ST7735 import Display, color565 import fonts/sysfont as sysfont sck = Pin(18)miso= Pin(19)
mosi= Pin(23)
SPI_CS = 26
SPI_DC = 5
spi = SPI(2, baudrate=32000000, sck=sck, mosi=mosi, miso=miso) display=Display(spi,SPI_CS,SPI_DC)
display.draw_text(0, 0, 'Hello World!', sysfont, color565(255, 0, 0)) In addition to font handling I received a link to micropython-nano-gui
The frame buffer
There are two different approaches to the display driver:- Every graphics primitive results in a direct write to the display controller
- All graphics primitives write to frame buffer memory. When all drawing is done the frame buffer memory as a whole is copied to the hardware
The goal
I now had:- a simple demo program I wrote for the SSD1306 module
- 2 demo programs running on the original ST7735 driver
- a bunch of demo programs from the SSD1351 driver
- Peter Hinch's library for font handling, including his writer to display the fonts, and his nanogui library including the fplot plot library
- draw_line(x0,y0,x11,y1,color) drawing the line directly on the hardware
- and a framebuf compatible method line(x0,y0,x11,y1,color)
which draws the line in the frame buffer memory
- size(): returns width and height of the display as a tuple
- clear(): clears the display
- display_on(), display_off() switches the display on or off
- cleanup(): clears the display, switches it of and deinits the SPI bus
- draw_pixel(x,y,pixel): draw a single pixel
- draw_hline(x,y,w,color): draw a horizontal line of length w, starting at the point x,y
- draw_vline(x,y,w,color): you guess!
- draw_line(x0,y0,x1,y1,color): draw a line from point x0,y0 to point x1,y1
- draw_lines(coords,color): draw lines where the point coordinates are given as a list of coordinate pairs
- draw_rectangle(x,y,w,h,color): draw a rectangle of width w and height h starting at point x,y
- draw_polygon(sides,x0,y0,r,color,rotate=0)
- draw_circle(x0,y0,r,color): draw a circle of radius r with center point x0,y0
- draw_ellipse(x0,y0,a,b.color): draw an ellipse with center point x0,y0 and half axis a,b
- draw_filledCircle(x0, y0, r, color): same as draw:circle but the circle is filled
- draw_filledEllipse(x0, y0, a, b, color)
- draw_filledPolygon(sides, x0, y0, r, color, rotate=0)
- draw_letter(self, x, y, letter, font, color, background=0,landscape=False): draw the glyph for letter at position x,y using the font font. If landscape is false the letter is drawn left to right, if landscape is true, the letter is rotated counter clock wise by 90° and is drawn from bottom to top
- draw_text(self, x, y, text, font, color, background=0,landscape=False, spacing=1, nowrap = False): I think you can guess! If nowrap is true and the text is larger than the length of a text line it is wrapped to the next line.
- draw_image(path,x0,y0,w=128, h=128): draw an image from a rgb565 raw image file to the display
- load_sprite(path, w, h): load a sprite of width w and height h from a rgb565 raw image file
- draw_sprite(buf, x, y, w, h): draw the sprite, which was previously loaded into buf
- fill(color): sets the entire frame buffer to color
fill(0): corresponds to clear() as all pixels in the frame buffer are set to 0 (BLACK) - pixel(x,y,pixel): draw a single pixel
- hline(x,y,w,color): draw a horizontal line of length w, starting at the point x,y
- vline(x,y,w,color): you guess!
- line(x0,y0,x1,y1,color): draw a line from point x0,y0 to point x1,y1
- lines(coords,color): draw lines where the point coordinates are given as a list of coordinate pairs
- rect(x,y,w,h,color): draw a rectangle of width w and height h starting at point x,y
- polygon(sides,x0,y0,r,color,rotate=0)
- circle(x0,y0,r,color): draw a circle of radius r with center point x0,y0
- ellipse(x0,y0,a,b.color): draw an ellipse with center point x0,y0 and half axis a,b
- fill_circle(x0, y0, r, color): same as draw:circle but the circle is filled
- fill_ellipse(x0, y0, a, b, color)
- fill_polygon(sides, x0, y0, r, color, rotate=0)
- letter(self, x, y, letter, font, color, background=0,landscape=False): draw the glyph for letter at position x,y using the font font. If landscape is false the letter is drawn left to right, if landscape is true, the letter is rotated counter clock wise by 90° and is drawn from bottom to top
- text(self, x, y, text, color, font=sysfont, background=0, landscape=False, spacing=1, nowrap = False): Please note the different parameter sequence as compared to draw_text
- image(path,x0,y0,w=128, h=128): draw an image from a rgb565 raw image file to the display
- sprite(buf, x, y, w, h): draw the sprite, which was previously loaded into buf
- show(): copies the frame buffer data to the hardware
The demos
From my tests with the SSD1306 driver I had- demo_ssd1306_fb.py: This program demonstrates
- the drawing of lines
- rectangles
- filled rectangles
- circles
- the plot of a sine function with a text
- demo_ssd1306.py has the same functionality but instead of passing through the frame buffer it writes to the hardware directly
 |
 |
 |
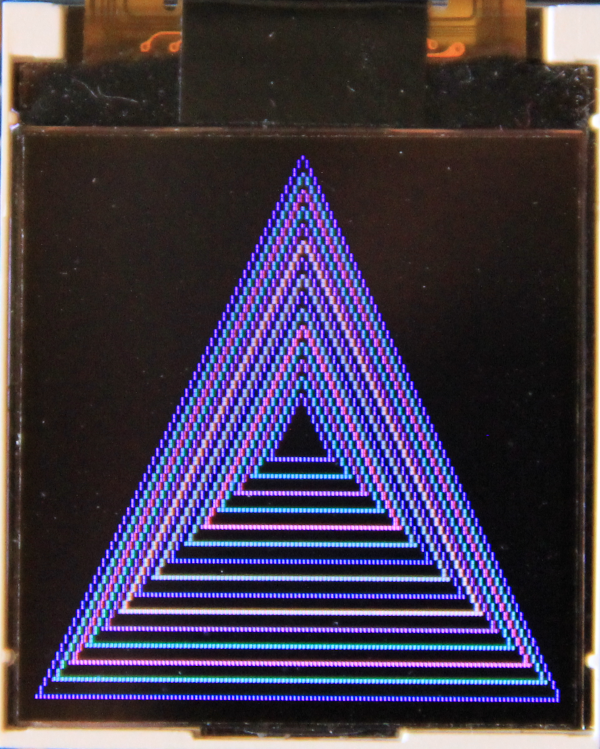
- graphicstest.py and
- graphicstest_fb.py
 |
 |
 |
 |
- demo_bouncing boxes.py: shows a number of differently colored filled rectangles that bump of the the edges of the screens
- demo_colored_squares.py: shows a number a filled rectangles in different colors
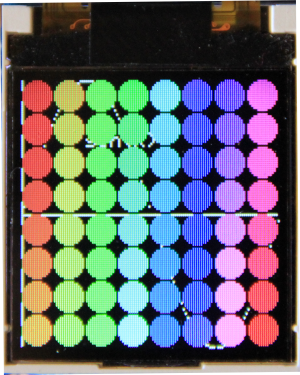
- demo_color_palette.py:
| Bouncing Boxes | Color squares | Color palette |
 |
 |
 |
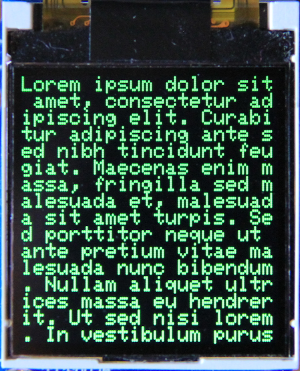
- demo_fonts.py
 |
 |
 |
 |
Video games
In the list of demos for the SSD1351 driver you even find 2 simple video games: Both games need additional hardware: a joystick in case of Super Mario and a linear potentiometer in the case of Arkanoid. demo-mario orriginally used a Bluetooth based joystick, which we don't have. I therefore replaced it with the analogue joystick from our sensor kit. Of course the software needed to be adapted correspondingly.| demo-mario | arkanoid |
 |
 |
GUI elements in nanogui
Peter Hinch's nanogui library contains a few widgets that can be used to graphically display sensor results. Their number is fairly limited (that is why Peter calls it nanogui) but extensions are possible if needed. nanogui contains:- a label
- a meter
- an led
- a dial
- color15.py
- color95.py
- aclock.py
| Clock | SHT30 meters | Voltmeter |
 |
 |
 |
Plotting
Peter's nanogui repository also contains a plotting package called fplot. This package allows to produce cartesian and polar plots to be generated. Particularly interesting is a feature that allows to add real time measurements to plots as they come in. Again a few examples:| Cartesian Plot | Polar Plot | Damped Oscillator |
 |
 |
 |
Comments


| I | Attachment | History | Action | Size | Date | Who | Comment |
|---|---|---|---|---|---|---|---|
| |
convertFont.py.txt | r1 | manage | 8.6 K | 2020-07-21 - 11:26 | UliRaich | |
| |
font.png | r1 | manage | 2.7 K | 2020-07-21 - 09:22 | UliRaich | |
| |
img_7952.png | r1 | manage | 205.7 K | 2020-07-27 - 13:30 | UliRaich | |
| |
img_7958.png | r1 | manage | 211.5 K | 2020-07-27 - 14:03 | UliRaich | |
| |
img_7959.png | r1 | manage | 220.4 K | 2020-07-27 - 14:03 | UliRaich | |
| |
img_7960.png | r1 | manage | 238.6 K | 2020-07-27 - 14:03 | UliRaich | |
| |
img_7961.png | r1 | manage | 244.8 K | 2020-07-27 - 14:03 | UliRaich | |
| |
img_7964.png | r1 | manage | 238.0 K | 2020-07-27 - 13:48 | UliRaich | |
| |
img_7965.png | r2 r1 | manage | 241.3 K | 2020-07-27 - 13:42 | UliRaich | |
| |
img_7968.png | r1 | manage | 263.5 K | 2020-07-27 - 12:36 | UliRaich | |
| |
img_7972.png | r1 | manage | 245.8 K | 2020-07-27 - 13:03 | UliRaich | |
| |
img_7973.png | r2 r1 | manage | 236.6 K | 2020-07-27 - 13:05 | UliRaich | |
| |
img_7982.png | r1 | manage | 196.5 K | 2020-07-30 - 09:49 | UliRaich | |
| |
img_7984.png | r1 | manage | 221.3 K | 2020-07-30 - 09:49 | UliRaich | |
| |
img_7990.png | r1 | manage | 204.3 K | 2020-07-30 - 09:49 | UliRaich | |
| |
img_7994.png | r1 | manage | 187.9 K | 2020-07-27 - 12:36 | UliRaich | |
| |
img_7996.png | r1 | manage | 237.4 K | 2020-07-27 - 12:36 | UliRaich | |
| |
img_8000.png | r1 | manage | 231.5 K | 2020-07-27 - 13:30 | UliRaich | |
| |
img_8003.png | r1 | manage | 165.4 K | 2020-07-27 - 13:53 | UliRaich | |
| |
img_8014.png | r1 | manage | 227.4 K | 2020-07-28 - 12:03 | UliRaich | |
| |
img_8016.png | r1 | manage | 191.6 K | 2020-07-30 - 09:49 | UliRaich | |
| |
img_8020.png | r1 | manage | 204.1 K | 2020-07-30 - 09:49 | UliRaich | |
| |
img_8025.png | r1 | manage | 181.8 K | 2020-07-30 - 09:49 | UliRaich | |
| |
img_8026.png | r1 | manage | 402.3 K | 2020-07-30 - 09:54 | UliRaich | |
| |
img_8030.png | r1 | manage | 187.2 K | 2020-07-30 - 11:24 | UliRaich | |
| |
lolon2.4inch.png | r1 | manage | 218.8 K | 2020-07-04 - 09:45 | UliRaich | |
| |
ssd1306.png | r1 | manage | 158.9 K | 2020-07-04 - 09:44 | UliRaich | |
| |
tftJumpers.png | r1 | manage | 626.4 K | 2020-07-17 - 16:16 | UliRaich | |
| |
tftScreen.png | r1 | manage | 144.4 K | 2020-07-04 - 09:45 | UliRaich |

Ideas, requests, problems regarding TWiki? Send feedback