Difference: DevicesNeeded (1 vs. 2)
Revision 22018-02-08 - UliRaich
| Line: 1 to 1 | |||||||||
|---|---|---|---|---|---|---|---|---|---|
Devices neededThe Raspberry PiThe Raspberry Pi features
| |||||||||
| Changed: | |||||||||
| < < |
| ||||||||
| > > |
| ||||||||
| |||||||||
| Line: 31 to 31 | |||||||||
| |||||||||
| Changed: | |||||||||
| < < | These interface pins are available on a 40 pin flat cable connector and are made available to the experimenter on a bread board through the cobbler. | ||||||||
| > > | These interface pins are available on a 40 pin flat cable connector and are made accessible to the experimenter on a bread board through the cobbler (the red PCB with the 40 pin flat cable connector). In contrast to the photo a longer breadboard must be used in order to have enough space for the sensors. | ||||||||
 | |||||||||
| Changed: | |||||||||
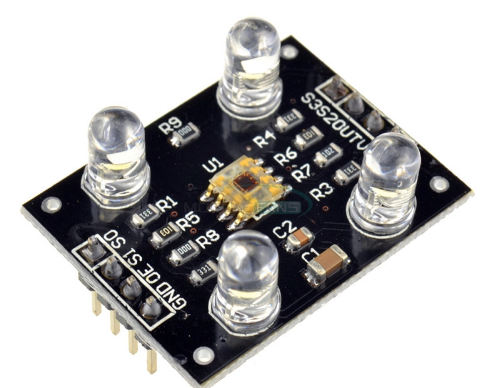
| < < | Now all we need are the sensors themselves and some connecting cables: | ||||||||
| > > | Now, all we need in addition are the sensors themselves and some connecting cables: | ||||||||
| Changed: | |||||||||
| < < | |||||||||
| > > | |||||||||
 | |||||||||
| Changed: | |||||||||
| < < | |||||||||
| > > | |||||||||
| Changed: | |||||||||
| < < |  | ||||||||
| > > |  | ||||||||
| Changed: | |||||||||
| < < |  | ||||||||
| > > | |||||||||
| Changed: | |||||||||
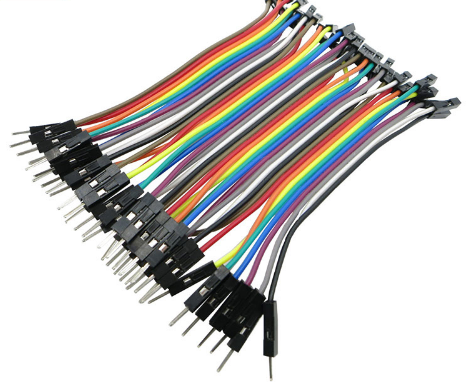
| < < | bread board wires | ||||||||
| > > | Most of the bread board wires will be male-male, however a few male-female wires are also needed to connect the TCS3200. I bent one row of pins such that they can easily be inserted into the bread board making the TCS3200 board stand vertically. In this case we need the male-female wires to connect the upper row of pins with the bread board.
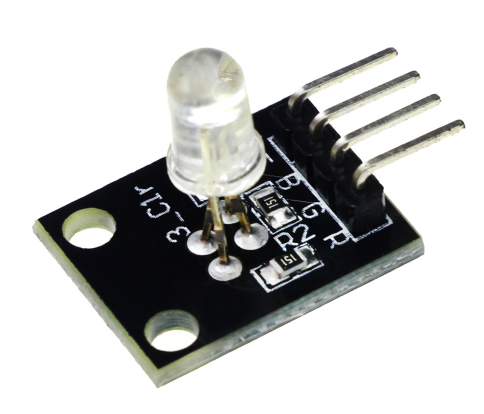 RGB LED with current limiting resistors.
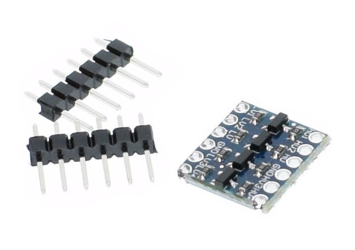
Since the Raspberry Pi GPIOs all work on 3.3V, the HC-SR04 as well as the TCS3200 however work with TTL (5V) logic, we need a level converter to bring down the sensor signal levels from 5V to 3.3V. This can be done either with a voltage divider using 2 resistors or with this level converter
RGB LED with current limiting resistors.
Since the Raspberry Pi GPIOs all work on 3.3V, the HC-SR04 as well as the TCS3200 however work with TTL (5V) logic, we need a level converter to bring down the sensor signal levels from 5V to 3.3V. This can be done either with a voltage divider using 2 resistors or with this level converter
 | ||||||||
-- Comments | |||||||||
| Changed: | |||||||||
| < < | |||||||||
| > > | |||||||||
| |||||||||
| Line: 64 to 75 | |||||||||
| |||||||||
| Added: | |||||||||
| > > |
| ||||||||
Revision 12018-01-21 - TWikiAdminUser
| Line: 1 to 1 | |||||||||||||||||||||
|---|---|---|---|---|---|---|---|---|---|---|---|---|---|---|---|---|---|---|---|---|---|
| Added: | |||||||||||||||||||||
| > > |
Devices neededThe Raspberry PiThe Raspberry Pi features
 It is better to use a plastic case for protection:
 In addition to the processor board itself we need a 5V, 2.5 A power supply with micro USB connector
 and a micro SD card for storage. This card will hold the operating system and all the user and system files.
 In order to access external devices like our sensors a series of interfaces are available:
Now all we need are the sensors themselves and some connecting cables:
bread board wires
-- Comments
| ||||||||||||||||||||
View topic | History: r5 < r4 < r3 < r2 | More topic actions...
Ideas, requests, problems regarding TWiki? Send feedback